Are you staring at your old, worn-out kitchen cabinets and dreaming of a makeover without spending a fortune? You’re not alone. Many homeowners shy away from remodeling because they think it’s expensive or too complicated. But the truth is, with a little creativity and the right guidance, you can create DIY cabinet doors that look professional and modern right from the comfort of your home.
In this guide, I’ll walk you through practical steps, share personal tips from my own kitchen renovation, and even include a real-life case study to inspire your project. By the end, you’ll see how easy it is to upgrade your cabinets on a budget while adding your personal touch.
Content
Why DIY Cabinet Doors Are Worth It
Before diving into the “how,” let’s talk about the “why.” Swapping out cabinet doors can:
- Instantly modernize your kitchen without tearing everything apart
- Save hundreds (sometimes thousands) compared to hiring a professional
- Allow for customization choose your style, color, and finish
- Make a fun, rewarding weekend project for DIY enthusiasts
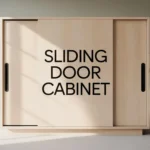
I know firsthand how rewarding it feels to open a cabinet and admire a fresh, polished door you built yourself. It’s more than just a cost-saving project it’s a true confidence boost. Whether it’s classic styles or sliding door cabinets, creating them on your own adds both pride and personality to your space.
Supplies You’ll Need for DIY Cabinet Doors
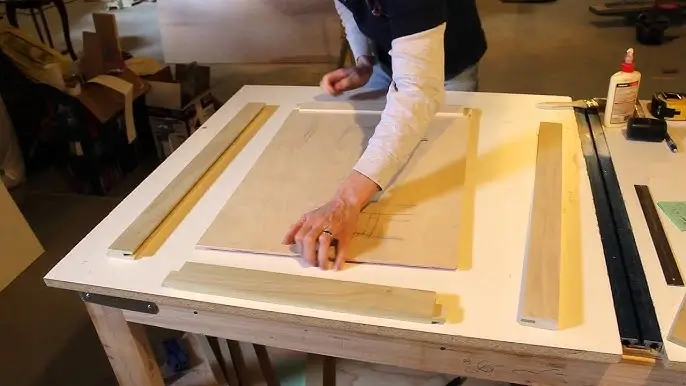
To get started, here’s a list of essentials for building cabinet doors from scratch or updating existing ones:
- MDF boards or plywood (for smooth surfaces)
- Table saw or circular saw
- Kreg rip-cut guide (or any straight-edge guide)
- Wood glue and clamps
- Sandpaper (various grits)
- Paint or stain of your choice
- Hinges and screws
- Measuring tape and pencil
Using a Kreg rip-cut guide makes your cuts straight and precise, even if you’re a beginner. Accuracy is key for doors that fit perfectly.
Plan and Measure Carefully
Accurate measurements are the foundation of a successful project. Measure the height, width, and depth of each cabinet opening. Don’t forget to consider hinges and any overlay if you’re updating old doors. Create a simple sketch for each cabinet. This will save time later and prevent costly mistakes.
Cutting Your Doors
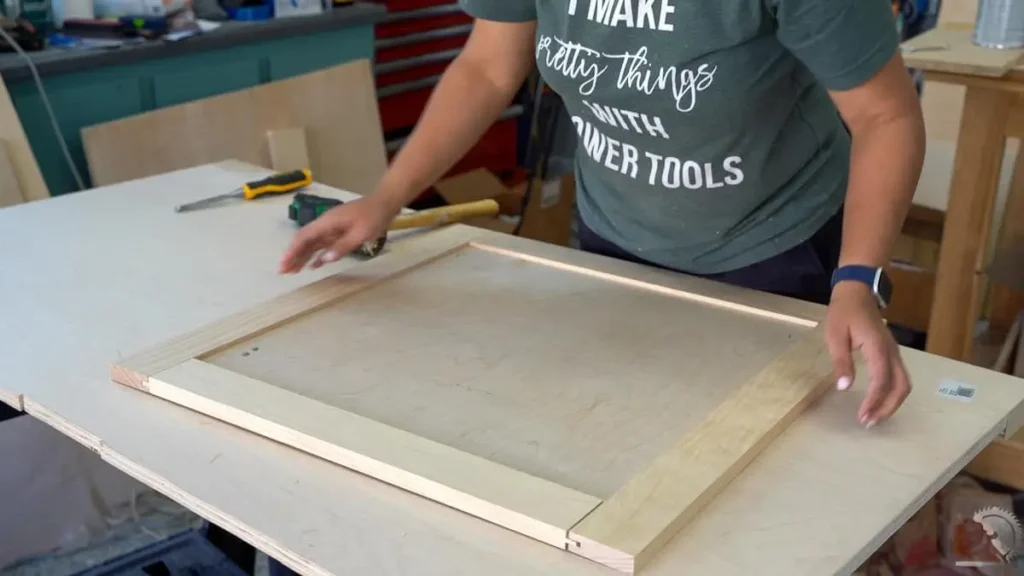
Now comes the exciting part of cutting your DIY shaker cabinet doors. Using MDF or plywood, cut the panels to size. For shaker-style doors, cut the frame pieces slightly smaller than the panel so it fits neatly inside.
If you’re refacing cabinets on a budget, consider reusing existing panels wherever possible. It’s eco-friendly and cost-effective.
Assemble and Glue
Once your pieces are cut, it’s time to assemble. Apply wood glue to the edges and clamp the frame together with the panel inside. Make sure everything is square before the glue dries.
- Use a combination square to check corners
- Remove excess glue immediately
- Let the doors dry for at least a few hours
Avoid rushing this step. A perfectly squared frame ensures smooth installation later.
Sanding and Finishing
Sanding makes a huge difference in the final look. Start with medium-grit sandpaper, then move to fine grit for a smooth surface. After sanding, wipe off dust and apply your chosen paint or stain.
- Consider using primer before painting for long-lasting results
- For a professional touch, lightly sand between coats
- Glossy finishes hide imperfections; matte finishes show wood grain beautifully
Painting DIY cabinet doors can be surprisingly relaxing, and it’s your chance to pick a color that truly reflects your style.
Installing Hinges and Doors
Finally, attach the hinges to each door and mount them on your cabinets. Take your time aligning the doors so they open smoothly and sit flush with the cabinet frame.
- Use a level to ensure doors aren’t crooked
- Test each door before tightening all screws completely
- Adjust hinges if necessary for a perfect fit
Real-Life Case Study: Sarah’s Kitchen Makeover
I recently helped a friend, Sarah, transform her outdated kitchen using DIY shaker cabinet doors. Her old cabinets were dark, scratched, and lacked character. Together, we:
- Measured all cabinet openings carefully
- Built MDF shaker-style doors using a Kreg rip-cut guide
- Painted them a soft, modern gray
- Replaced old brass hinges with matte black hardware
The result? A stunning kitchen that looked brand new without spending thousands. Sarah told me the process gave her a sense of pride she didn’t expect she loved showing off the finished cabinets to friends and family.
Common Mistakes to Avoid
Even with the best instructions, beginners can make a few mistakes. Here’s how to avoid them:
- Skipping measurements: Always double-check before cutting
- Rushing assembly: Clamping and glue drying are crucial
- Ignoring sanding: Smooth surfaces make a huge difference in paint adhesion
- Wrong hinges: Choose hinges suitable for your door thickness and overlay
Conclusion:
Creating DIY cabinet doors is more than just a budget-friendly project it’s a chance to refresh your kitchen and highlight your creativity. Whether you’re working on a weekend upgrade, building doors for RTA kitchen cabinets, or planning a full kitchen makeover, the right approach ensures your cabinets look modern, professional, and uniquely yours.
The key lies in careful planning, precise cutting, and a little patience. Once you install your new cabinet doors, you’ll see that every bit of effort was completely worth it.
FAQs About DIY Cabinet Doors:
Q1: What is the cheapest way to replace cabinet doors?
Refacing or painting DIY cabinet doors is the cheapest way to upgrade your kitchen cabinets on a budget.
Q2: Can you make your own cabinet doors?
Yes, you can make your own DIY cabinet doors using MDF or plywood and basic tools at home.
Q3: Is it cheaper to buy cabinets or make them yourself?
Making DIY cabinet doors is usually cheaper than buying new cabinets, especially for a budget-friendly kitchen upgrade.
Q4: What wood to use for DIY cabinet doors?
MDF, plywood, or solid wood are great options for DIY cabinet doors depending on your budget and finish preference.

I’m Steve Hembree. I love to share my tips and tricks for home improvement, as well as provide ideas for how you can transform your space with DIY projects.


