Whether you are giving your bathroom walls a revamp or redoing your kitchen floors, tiling is a great option. Over the years, interior design trends have come and gone, but tiling has remained resilient both in terms of style and durability. Regardless of whether you choose tiles for practical purposes or aesthetic motivations, tiling has long been popular when it comes to home renovations. If you are looking for something that stands the test of time, tiles are a great option.
With that being said, however, the installation of tiles, be it on the floor or walls, is a job that is easier said than done. In fact, unless you are a highly proficient DIYer, tiling is a job best left to the professionals. If, however, you do go it alone and choose to do a tiling job yourself, there is one crucial decision you will have to face that could make or break the end result of your tiling DIY project. This decision focuses on what you will use for the installation of your tiles.

Tile Adhesive or Cement?
There is some debate over whether the traditional method of using a sand cement mix is better than opting for the more modern technique of applying tile adhesive. While some may argue that it’s easier to go for the cementing option, we’ll explore the benefits of tile adhesive in this post. We’ll start by establishing what exactly tile adhesive is and how it’s made up before going on to discuss the benefits of choosing tile adhesive for your DIY project over a more traditional cement mixture.
What Is Tile Adhesive?
Let’s begin with the basics. Tile adhesive is a premixed blend of cement, well-graded fine sand and select substances, like latex powder. These come together to create a product that possesses all the necessary properties for laying tiles and giving the project the strength and flexibility required to withstand the pressures of daily use.
Tile adhesive can be used to fix a wide variety of tiles and stones onto different surfaces. Depending on the tile adhesive you choose, it can be used to lay tiles on top of existing tiles, finished concrete and even wooden substrates. However, each type of tile adhesive contains a specific composition tailored for the use on a particular kind of surface and to provide the best result based on the usage area and atmosphere. This is how superior bonding strength provided by the most suitable tile adhesive can prevent shrinkage, cracks, and the slippage of tiles.
Why We Love Tile Adhesive
If you are still on the fence about choosing to work with tile adhesive for your next tiling project, here are some of the significant benefits of choosing this option.
Easy to Use
This product is incredibly easy to use. Mixing the tile adhesive with water is straightforward, and it is far less messy to use than traditional cement. What’s more, you don’t need to soak your tiles before laying them. It is just a case of unboxing the tiles and getting started.
The Process Is Fast
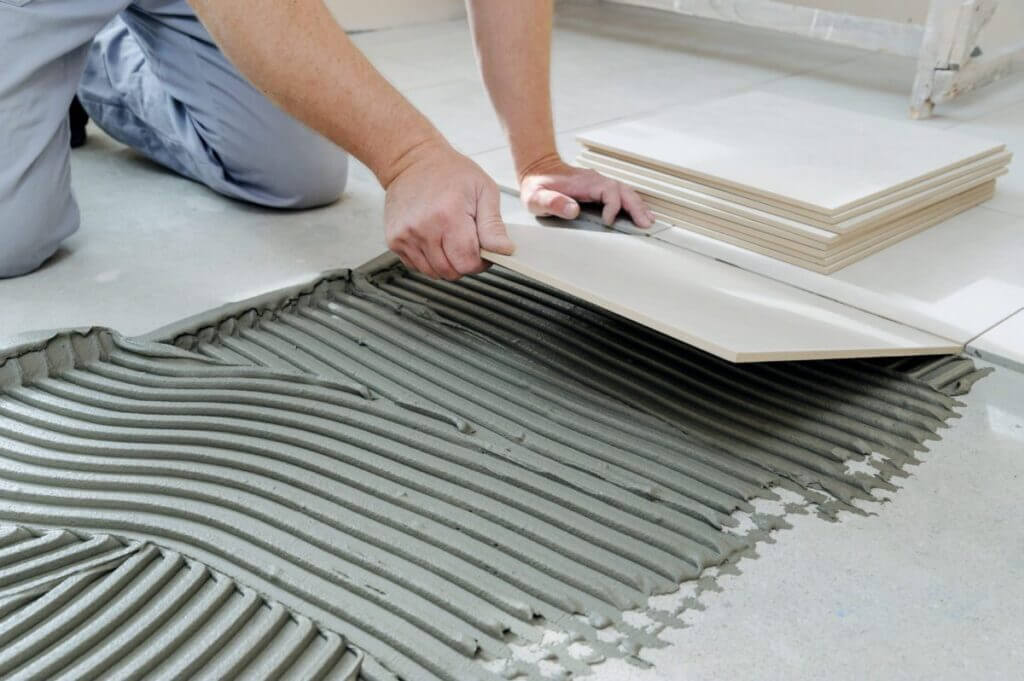
Using a notched trowel to apply the tile adhesive onto the chosen surface doesn’t take long. The substance dries quickly too, which means your job will be complete in next to no time.
Longevity
There is nothing worse than spending an afternoon tiling only to wake up the next day to find tiles falling to the floor. If you allow ample setting time as instructed on the tile adhesive packaging and use the notched trowel to lay the tiles, you’ll reduce the likelihood of common problems, such as broken tiles and water seepage. Provided that you’ve bought yourself a top-quality tile adhesive, you’ll find that the bonding strength of the product is superior to traditional cement and will ensure your tiling job stands the test of time.
Versatility
You’ll find a wide range of tile adhesives available on the market. Each tile adhesive is formulated for specific purposes, such as to lay tiles for glass mosaics or on polished substrates, or to use on a drywall system. You can also find tile adhesive that is tailored for use on existing tiles, so you won’t have to stress about removing them. Just be sure to choose the right tile adhesive for the nature of your tiling job.
Cost-Effectiveness
Using tile adhesive, along with a notched trowel, means you need to use far less material than you would if you chose to use cement. Adhesive layers tend to be much thinner than the equivalent sand-cement mixture you’d need, which also leads to a lighter load on the structure of your building. While the total cost will depend on the type of tile adhesive you choose to use, overall, this is the most cost-effective solution for tiling projects.
How Do You Apply Tile Adhesive?
If you are comfortable with mid-level DIY tasks, tiling your bathroom or kitchen shouldn’t be that much of a struggle. Once you have correctly prepared the wall for tiling, you need to work out the volume of tile adhesive required for the project before you start mixing and applying it correctly. Ensuring that the tile adhesive is perfectly mixed and applied will ensure your tiles are safe and secure on the intended surface.
Before you start any tiling, read the manufacturer’s instructions on the packaging of your tile adhesive. This will provide helpful information on the types of the tile it can be used with, as well as how much water you need to use for the mix.
Next up, make sure you are wearing the appropriate clothing and safety gear, including gloves, eye protection and a face mask. Remember that cement-based powders are known to cause irritation.
Start by pouring the specified amount of water into your bucket and then stir in the tile adhesive, ensuring that you reach into the sides and bases of your bucket to get all of it mixed up. Using a mixing paddle will help with this. Mix until the consistency is smooth and there is no visible powder or lumps in your solution.
Now it is time to apply the adhesive to your surface. Tile adhesive can set quickly once it is spread out onto a surface, so start off with a small area, so you don’t waste too much of your adhesive mixture.
Use a notched trowel to create channels to provide a texture that offers more grip for the tiles. Then push your tile into the adhesive and give it a slight twist to ensure it becomes securely attached to the wall and the amount of air sitting between the tile and wall surface is reduced. Repeat this step as required on each tile and use a spacing tool to separate the tiles as you proceed.
Once you have completely tiled the entire area, allow the tile adhesive to set. Check the manufacturer’s instructions for details on the required drying time.
Final Thoughts
In short, tiling remains a particularly popular method for decorating walls and floors. While some people opt to hire professional tilers to get the job done to the highest standard, there is no reason a competent DIY enthusiast cannot tackle most tiling jobs around, especially when you consider the advanced nature of tools and products available on the market.
Tile adhesive is one such product that has really revolutionised the tiling industry by making it easier and more cost-effective for people to take care of tiling jobs. Not only is the use of tile adhesive faster, more efficient, and more manageable than the use of traditional cement, but it is also more cost-effective and produces a better overall result. So, you don’t have to stress about your precious tiles cracking or coming loose anytime soon.
There is an extensive selection of tile adhesives available today and to find the best tile adhesives on the market, it is best to shop with a reputable tiling specialist. In addition to finding specialist tile adhesives to assist with your project, you’ll also find loads of those essential tools you need to get that job done. So, what are you waiting for? Shop for your tile adhesive and much more today and discover the benefits of tile adhesive for yourself!

Shery Walls is a dedicated home blogger who has been blogging for over six years. She covers everything home related. Shery also loves writing posts about her travels to Europe with her husband and two children.


